Build a Consent Form
First Design of a Consent Form with Right Consents
Learn how to design your first consent form by defining element models using Right Consents backoffice and form layout with the graphical designer.
- Understand how consent collection is modelized in Right Consents
- Discover the backoffice and define some consent model elements
- Use the assembly tool to design your own consent form layout
- Export the generated layout for futur usage or integration
Prerequisites
To complete this guide you need :
- Roughly 45 minutes
- A running Right Consents
Overview
In this guide you will use the backoffice application to start defining your consent library elements.
This guide also covers some basic aspects of designing consent form layout by assembling your consent library elements in various way.
Consent Model Elements
As explained in the overview, before any other operation, the first stage consist of defining consent model elements.
Right Consents consent collection is based on an assembly of pieces of small elements. Elements that can takes part in collecting consents are information (contains generic information about privacy), processings (describe a single processing), preferences (store the user preferences but does not appear in the receipt) and terms of services (can only be used alone in an assembly). Those elements have specific rules depending on their specificity.
There is also two other elements that does not takes part directly in the consent collection : themes (to modify the html style) and emails (to setup sample confirmation email)
In order to collect consent, you have to setup at least the information element and one processing. In this tutorial we are going to create an information model, two processings and one preference in order to be able to create different assembly.
Information
Information models are designed to store some information about privacy, data policy or an information regarding the company data processing information that need to be visibile in the consent and in the receipt. Some mandatory legal information like the data processor contact are also included in that model.
Some fields are free text and are designed to be visible in the consent header and in the footer allowing some flexibility in the information delivered to the enduser.
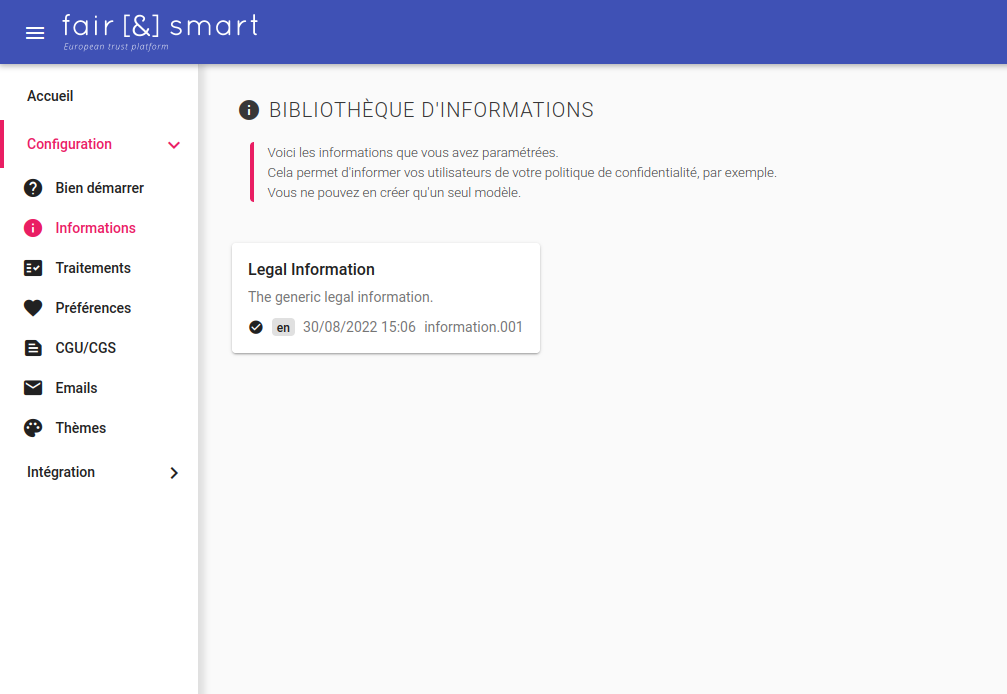
To define information model you have to go to the backoffice webapp and login as admin (demo@demo.com/demo42). In the Configuration section you should be able to open the Informations sub section and click on the plus in order to create a new one. In the community version, only one information model can be setup for easyer understanding of application.
Choose a relevant name and description for that model (only for internal management). After model creation, a key is allocated to that model (information.001) that you'll have to use later as a reference to taht model. Then you can populate the model data content. One single model can have multiple version of data content.
- Title: Legal Information
- Header Content : The Cheesecake Factory Incorporated and its parents, subsidiaries, and affiliated entities (“The Cheesecake Factory,” “the Company,” “we”, “us” or “our”) respects your privacy and we are committed to protecting it through our compliance with our privacy policy (“Privacy Policy”).
- Footer Content: Thanks for your confidence
- Data controller
  - Company: The CheeseCake Factory
  - Address: 26901 Malibu Hills Road, Calabasas Hills, CA 91301
  - Email: privacyofficer@thecheesecakefactory.com
  - Phone Number: 18664582951
- Privacy Policy URL: https://www.thecheesecakefactory.com/corporate-information/privacy-policy
For full documentation about Information, please visit the Consent Elements Doc.
Now you are ready for publishing that version of the information model by clicking on 'Save Draft' button and then on the 'Activate' button.
By activating the version you will be able to use it for collecting consent. As soon as a consent is collected using that version of the information model, you will no longer be able to delete it.
Information about model lifecycle is visible in the top of the right panel. You may notice that version 1.0 is active and that a unique serial number has been allocated to that particular version.
If you perform modification on that model you will have to activate the next version and a popup will ask you for a Major or Minor release evolution. A Major one will result in considering already collected consent with that information to be stalled whereas a Minor one will be compatible with already collected consent but will replace previous one in the next generated consent transaction.
Processings
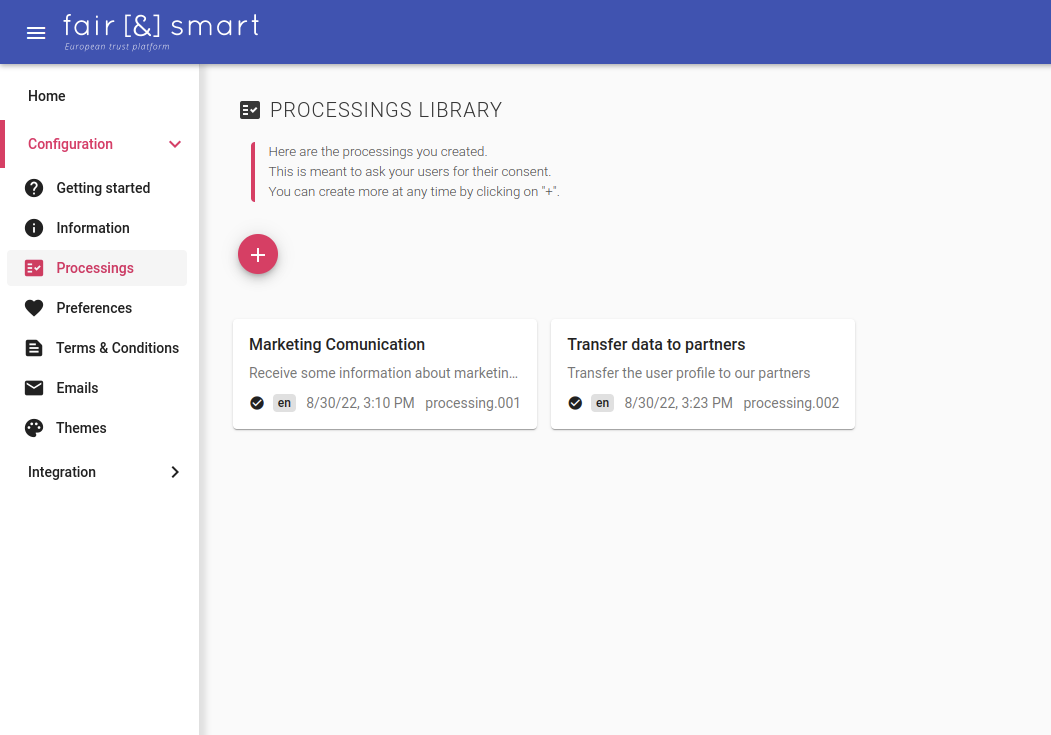
As for the information model, we are now ready to create two processing ones in the relevant subsection. A first one will be related to user contact information for marketing usage. A second one will be related to user profile information transfer to partner for discount commercial offers.
In the Configuration section you should be able to open the Processings sub section and click on the plus in order to create the first one.
Choose a relevant name and description for that model (only for internal management). After model creation, a key is allocated to that model (processing.001) that you'll have to use later as a reference to taht model. Then you can populate the model data content.
- Title: Contact Marketing
- Processed data : Your contact informations (name, surname, email, phone number)
- Data retention period: We are keeping your contact information 2 years
- Purpose: We will contact you according to your preferred channel (email, sms or phone) when we will lunch new product from our brand in order to give you special discount.
- Purpose Categories: Marketing
- This processing can be refused: true
The second one will also contain another data controller information as it is for a data transfer. Choose a relevant name and description for that model. After model creation, a key is allocated to that model (processing.002)
- Title: Transfer data to partner
- Processed data : Information about items you have already purchased and/or visited on our website as your product interest categories.
- Data retention period: All the lifetime of your profile plus 6 month
- Purpose: We want to optimize the communications between you and our partners according to your interests in order to avoid useless ones and focus on the best relation experience we can offer.
- Purpose Categories: Improved service, Third part sharing
- Third Parties:
    - name: VoucherDiscount
    - description: This partner is producing discount vouchesr for all cake builders in the city.
- Data Controller:
    - company: VoucherDiscount
    - address: 11, another street, 21345 Same Town.
    - email: contact@voucher-discount.com
- This processing can be refused: true
As for the information model, do not forget to publish thoses versions by clicking on 'Save Draft' button and then on the 'Activate' button.
For full documentation about Processing, please visit the Consent Elements Doc.
Preference
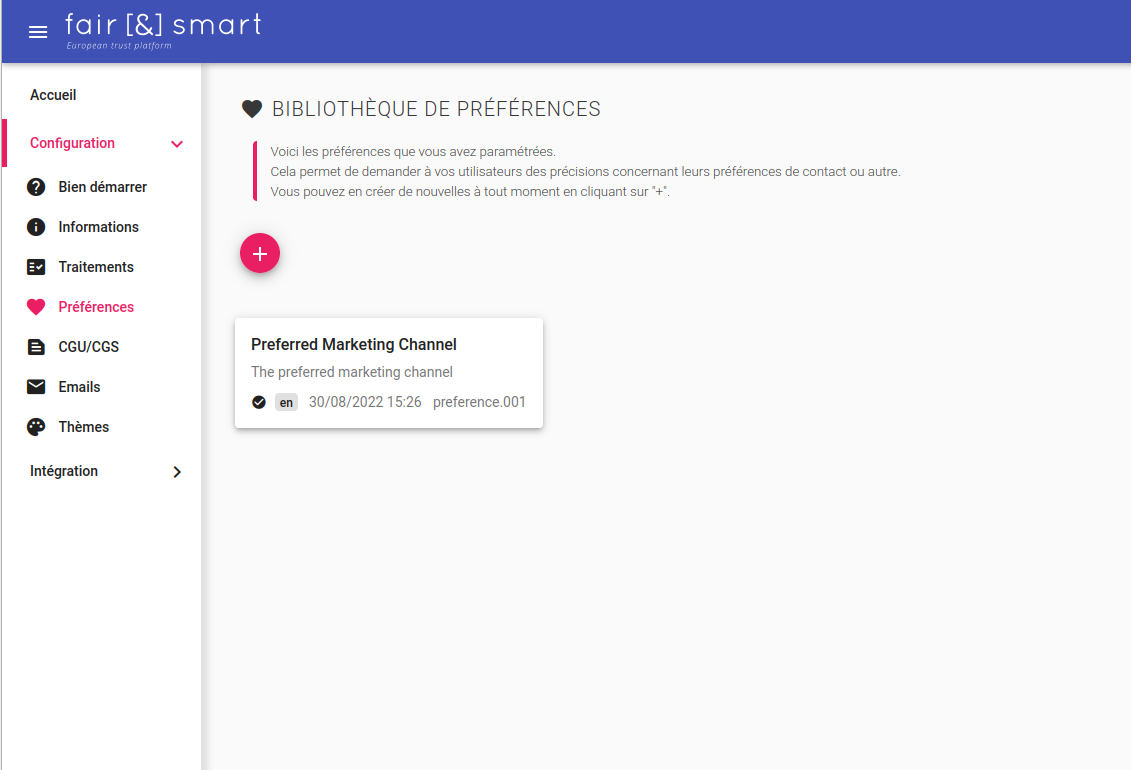
As for others model, we are now ready to create a preference one in the relevant subsection. That preference will give the user the opportunity to choose its preferred channel for receiving marketing information.
In the Configuration section you should be able to open the Preferences sub section and click on the plus.
Choose a relevant name and description for that model (only for internal management). After model creation, a key is allocated to that model (preference.001) that you'll have to use later as a reference to taht model. Then you can populate the model data content.
- Content:
  - Prefered label: Preferred Marketing Communication Channel
  - Description: What is your preferred channel to receive marketing comunications about new products, discount vouchers of our partners, special events....
- Answer type: checkboxes
- Options: email, sms, phone
- Use as default answer: email
As for other models, do not forget to publish thoses versions by clicking on 'Save Draft' button and then on the 'Activate' button.
For full documentation about Preferences, please visit the Consent Elements Doc.
Design a collection form
Now that we have 4 elements defined, we can go to the second stage which consist to assemble declared elements into specific layout that fits with the final integration goal.
Use the backoffice to assemble defined elements
In the Integration section you should be able to open the Collect sub section and see the form designer.
The created elements are visible in the right panel and can be drag'n drop in the central design zone to assemble elements in the desired order. We are going to include all the elements we have already defined: information.001, processing.001, processing.002, preference.001
Information is mandatory for processing collect whereas TOS can only be collected alone without anything else.
Drag'n Drop the two processings and the preference. Order in the designer will be preserved in the final form.
By clicking on 'Next' you will access to the layout design for the included elements. You can change for exemple from a vertical to an horizontal layout. You can also specify labels and some action availability. It is also possible to specify a "Theme" element that will apply a specific look'n feel if desired.
The 'Next' step will give you access to the Consent Context definition step. Here you can use the designed layout in a real Consent Context. The difference between Consent Context and Consent Layout is that layout is the same for all users whereas context contains user and context specific information.
For full documentation about Context, please visit the Consent Context Doc.
Now you can click on the 'Get API Call Url' to submit the Consent Context (that include the layout) to the API in order to generate a Consent Transaction. The generated transaction URL will give an acces to the Consent Collect Workflow either in plain HTML or in JSON depending on your needs of customization during the integration in external applications.
As an administrator, you can create transaction for any user but for a single user it is only possible to generate a transaction for themselves. For complete documentation about authentication go to the dedicated guide.
You will notice that the generated URL contains also a token. That will ensure a transaction level authentication, allowing to send that self authentified link by email for exemple.
{% include gallery caption="This is a sample gallery with Markdown support." %}
Export the generated context
In the popup with the generated transaction URL you will also notice other panels. One of them is named "JSON Context" and contains a representaiton of the generated context that can be exported.
More thant just pushing the generated URL to an email or any other channel, the generated context JSON can then serve as a basis for integration in existing target applications. Some parts of that context could be made variables depending on the integration needs. Here is a minimal version of a context:
{
  "layoutData":{
    "type":"layout",
    "elements":["processing.001", "preference.001", "processing.001"],
    "orientation":"VERTICAL",
    "info":"information.001"
  }
}
Using that JSON file to generate new transaction can also be done by calling the API directly, for a guided tour of the API please visit the Discover API Guide.